Red poppy-Photoshop Illustrator Painting Lecture / Botanical Art포토샵 일러스트 작가의 그림 그리기 강좌 -Red poppy 보태니컬 아트
Photoshop Illustrator Painting Lecture -Red poppy Botanical Art
Photoshop art.
Illustration course
Photoshop Illustrator Painting Lecture -Red poppy Botanical Art
kiki
September 29, 2017
Photoshop Illustrator's Drawing Lecture - Guangzhou
Photoshop Illustrated Lecture.
Today, I will introduce the process of completing illustrations using basic brushes.
Photoshop Illustrated Lecture.
Today, I will introduce the process of completing illustrations using basic brushes.
Photoshop art.
Digital Illustration
Photoshop art. Digital painting illustration
Photoshop illustration class.
I used the basic brush to express the flower image realistically.
Slowly, please try one by one.
I used the basic brush to express the flower image realistically.
Slowly, please try one by one.
Tutorial
1. Open a new file ctrl + N
2. Create a new layer and sketch it in light color
2. Create a new layer and sketch it in light color
1. Add a new layer below the sketch layer
2. The whole painted in red box
2. The whole painted in red box
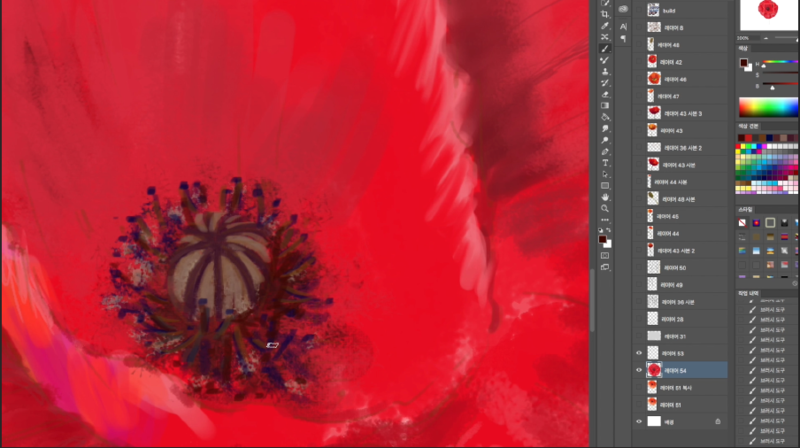
1. Take detail in the dark and bright colors based on red box
Figure 1 depicts the details of the surgery inside the flower box
1. Use the Mix Brush to gradient the border.
2. Add the layer to Multiply. Draw the contrast of flowers
2. Add the layer to Multiply. Draw the contrast of flowers
1. Draw the stem
1. Add layer (add linear dodge) and use brushed brush to express bright part
2. Brush naturally with Mix brush
2. Brush naturally with Mix brush
1. Zoom in and touch detail
1. After adding layers, change the mode to Multipla.
2. Deeper shading
2. Deeper shading
1. Use the airbrush in the linear dodge (add) layer
2. Gently roll the light along the edges of the petals
2. Gently roll the light along the edges of the petals
1. Brightness adjustment of highlight layer (30% opacity-)
2. Completion of white background work
2. Completion of white background work
1. After adding layers, paint the background gray and then scatter with scattering brush.
2. Completion of a gray background work.
2. Completion of a gray background work.
패션일러스트,일러스트레이터,일러스트레이션광주 광산구 일러스트,신창동,일러스트 화실,취미미술,
성인미술,광주 일러스트 ,학원,그래픽디지탈아트,페인팅,
painting,illustration,illust,drawing,fashion illustration ,art, drawing
Copyright ⓒ 키키일러스트 KIKI ILLUST All rights reserved.
성인미술,광주 일러스트 ,학원,그래픽디지탈아트,페인팅,
painting,illustration,illust,drawing,fashion illustration ,art, drawing
Copyright ⓒ 키키일러스트 KIKI ILLUST All rights reserved.
| 이 글은 Evernote에서 작성되었습니다. Evernote는 하나의 업무 공간입니다. Evernote를 다운로드하세요. |


0 개의 댓글